Can You Screen Print and Embroider Fabric Panels Before Sewing?
Established streetwear brands can print or embroider cut fabric panels before sewing, but the right production sequence depends on what the finished garment must look like. This guide explains when early decoration helps, when it creates new risks, and what product teams should approve before a custom design enters bulk production.
Quick Answer: Yes. Screen printing and embroidery can be completed on individual fabric panels before garment assembly. This gives the equipment access to areas that may be blocked by pockets, seams, or zippers later. The choice is not automatic: pattern dimensions, seam allowances, fabric stretch, ink curing, embroidery support, and later washing must all be reviewed before production.
What Should Established Streetwear Brands Take Away?
- ▸Decorate before sewing when a pocket, seam, or closed garment shape would block the required print or embroidery position.
- ▸Approve artwork against actual sewing lines and finished garment measurements, not only the flat cutting outline.
- ▸Test ink curing, embroidery support, fabric movement, and any planned garment wash as one connected production route.
- ▸Compare the full cost of both routes, including damaged panels, replacement cutting, handling, and assembly checks.
- ▸Release bulk sewing only after the decorated panel and the assembled approval garment meet the agreed visual and technical limits.
Can Screen Printing and Embroidery Be Applied to Fabric Panels Before Sewing?
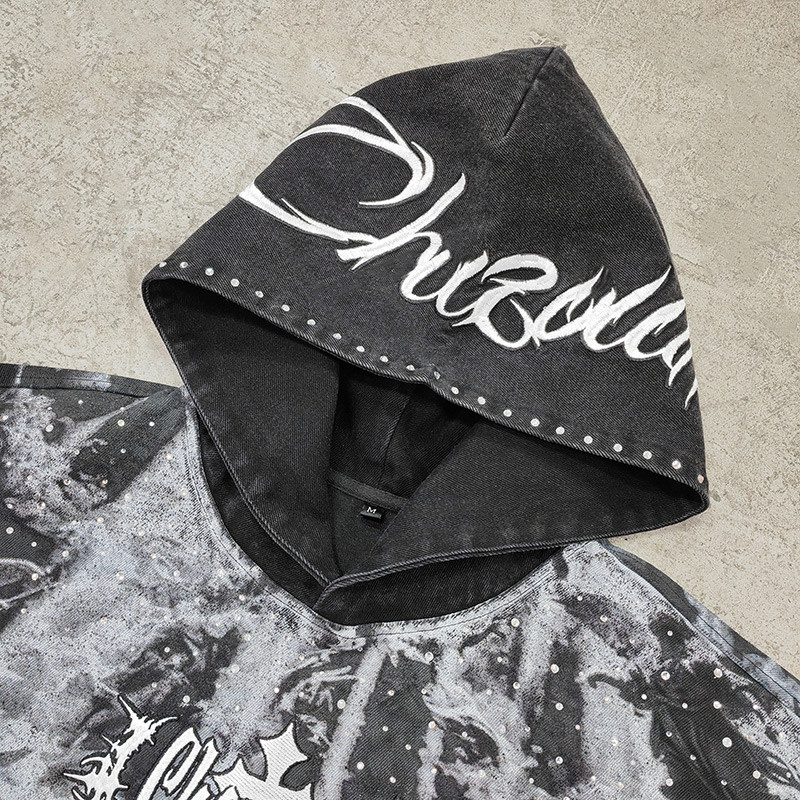
Yes. Fronts, backs, sleeves, pocket pieces, and hood sections can be decorated while they are still separate fabric components. Flat-panel access can make certain placements practical, yet it does not settle whether the artwork will look right once seams are sewn. The factory must judge the decoration on both the loose panel and the finished shape.
A garment normally starts with an approved pattern. Fabric is spread and cut into pieces with defined seam allowances. Depending on the design, the printer or embroidery operator can then work on selected pieces before they move to sewing. This is different from printing a whole fabric roll, where the design is applied before garment pieces are cut. It is also different from decorating an assembled T-shirt or hoodie.
Which panels are practical candidates?
A back panel may carry a large screen print. A pocket piece may receive embroidery before it is attached. A hood side panel may be easier to hoop before the hood is assembled. Some decorative areas are still unsuitable because they are too small for stable handling, are distorted by curved seams, or require the final garment shape for accurate placement.
For a custom streetwear program, the relevant manufacturing scope is cut-and-sew clothing manufacturing: the pattern, fabric, construction, and decoration are planned together. The same original graphic could need different treatment on a one-piece front panel and a front built from several sections. That raises the first real decision: is early decoration actually better for this construction?
When Is Pre-Sew Decoration Better Than Printing or Embroidering a Finished Garment?
Choose the decoration stage by access, placement, construction, and finishing needs. Flat panels are useful when a closed pocket, zipper, or seam would obstruct a machine or create an uneven surface. Finished-garment decoration remains practical for many standard chest and back designs. Neither route should be approved until its effect on the final garment is checked.
An oversized T-shirt with a centered chest graphic may be straightforward to print after sewing. The assembled garment offers a clear reference for where the print sits on the body. Yet a graphic that continues under a sewn-on pocket needs a different approach. If the print should disappear beneath that pocket, decorating the front panel first may match the design more naturally.
Embroidery has a related, but not identical, choice. A small emblem on the outside of a sleeve may be easy to reach before the sleeve seam is closed. A chest emblem that must align with a zipper or finished neckline may be easier to assess on an assembled piece. Hoop clearance, backing removal, and the weight of the embroidery affect that choice.
The table is a starting assessment, not a universal routing rule. A large water-based print, a high-build ink, and a densely stitched embroidered patch can each change how a panel behaves. Product teams should ask their manufacturer for two specific things: the recommended stage and the reason an alternative stage was rejected. For engineered artwork, the next obstacle is usually the seam itself.
How Can a Graphic Cross a Side Seam, Pocket, or Garment Edge Without Losing Its Design?
A continuous graphic must be planned around the sewn garment, not just the flat print layout. Artwork needs to account for the fabric hidden inside seam allowances, pocket coverage, and possible movement during sewing and washing. Printing panels before assembly can make the image possible, but the final seam match must be tested and given an agreed tolerance.
Why do separate panels create a seam-matching risk?
Consider a large artwork that wraps from the front of an oversized T-shirt around the left side to the back. The visible front and back do not meet at their raw cut edges. They meet at their stitch lines, after seam allowance has been taken in. If the print file is divided using raw edges, part of the image can disappear inside the seam. Even with correctly split artwork, slight sewing movement can create a visual step.
The technical team needs a shared reference: the approved pattern, visible stitch-line position, graphic split, and target appearance after assembly. High-contrast straight lines reveal small shifts more clearly than broken, distressed artwork. A brand should specify which features must join at the seam and which may have a planned interruption.
How should graphics and pockets interact?
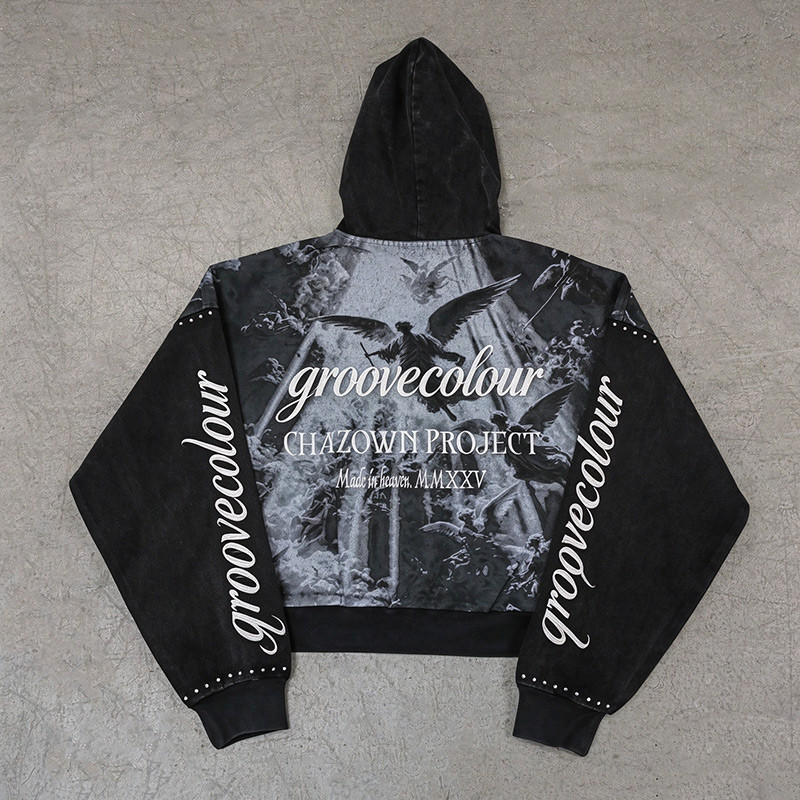
On a hoodie, a word may run underneath the kangaroo pocket. If that is the intended effect, print the base panel before the pocket is attached, then place the pocket over the approved portion of the artwork. The pocket dimensions, top edge, side positions, and stitch lines all become decoration controls. Printing after the pocket is attached would create a different visual effect, even with the same artwork.
Cross-Seam Artwork: Four Approval Points
- Identify the finished sewing line on every artwork-bearing panel.
- Show the intended graphic continuation and any deliberate break.
- Sew a sample using decorated panels, then inspect the seam while laid flat and worn.
- Record the acceptable visual offset for that specific fabric, artwork, and construction.
Technical teams should avoid a promise of an invisible join on every garment. A tight plain jersey and a heavy brushed knit can respond differently to feeding and pressing. How much movement is acceptable belongs in the approved specification. Once the seam map is clear, the artwork still needs to work across the full size range.
How Should Artwork Placement Change Across Cut Panels and Garment Sizes?
Placement should be measured from stable pattern and garment reference points, with separate checks for the size range. A print that looks centered on an isolated panel may sit too high, too low, or too close to a seam after assembly. Approve the position on the intended silhouette, then document how other sizes will be handled.
Should the printer measure from cut edges or finished seams?
The correct datum depends on the design, but the two references must not be confused. Cut edges may be convenient for a fixture. The finished centerline, shoulder point, pocket edge, or seam often matters more to the person wearing the garment. An approved placement sheet can show both: the factory's registration points and the brand's finished visual target.
For example, a back print might be measured down from the finished neckline. That measurement is meaningful to the creative director. The printing operator may instead locate the design using marked points on the back panel before the collar is attached. The technical file must explain how those two measurements relate. Otherwise, both teams can follow their own instructions and still produce the wrong placement.
Does every size need a different artwork file?
Not necessarily. A fixed logo size may suit all approved sizes. A large graphic that fills the front body may need more than one artwork scale, placement group, or screen. The choice depends on the visible proportions the brand intends to preserve. A size M sample alone cannot prove the appearance on the smallest and largest sizes.
For complex graphics, review at least the ends of the size range, especially where dropped shoulders, extra sleeve volume, or different body lengths change the visual center. The broader pattern development and cutting stage provides the measurements needed to make that decision before decoration starts.
Fabric geometry can add another source of change. ASTM D3882-08(2025) addresses bow and skew in woven and knitted fabrics and may also be used for printed geometric designs. It is useful background when a straight graphic is affected by skew, but it does not set a universal acceptable seam-match tolerance for streetwear. See the ASTM test scope. With placement rules established, the next decision concerns the print process itself.
What Should Be Controlled When Screen Printing Is Done Before Assembly?
Printing separate panels requires reliable registration, suitable ink, adequate curing, and careful handling before sewing. A clean print is not enough if it changes the fabric size, transfers onto another piece, or cracks after finishing. The operator should verify the actual ink system and panel material, then inspect both printed pieces and assembled samples.
The first check is registration. A printed panel must be oriented the right way on the printing surface. Front, back, left sleeve, and right sleeve pieces should be identified before printing, particularly when the design is directional. A few millimeters of movement may not matter for loose artwork, but it can be obvious when two colour layers or two panels must meet.
Can heat curing change the panel before it reaches sewing?
It can. Heat, dwell time, and tension can affect some fabrics. The exact response depends on fiber content, knitting or weaving, previous processing, and the ink system. A factory should check whether the printed piece retains its required dimensions after curing and cooling. If it changes shape, a seam that was planned against the original panel may no longer align as intended.
Cure temperature must follow the specific ink manufacturer's instructions. ScreenPrinting.com's ink curing guidance explains that the full ink layer, not only the exposed surface, needs to reach the specified curing condition. It also distinguishes water-based ink, which must release moisture, from plastisol systems. A single temperature figure should never be applied to all inks.
What happens after the print has cured?
Printed panels still need sorting, stacking, and transport to sewing. Ink surfaces may be marked by rough handling. Pieces from different sizes can be mixed if their identities are unclear. A useful production sheet lists panel code, size group, print orientation, ink specification, and whether a later finishing process is planned.
A test should reflect the actual design. A thin one-colour water-based graphic and a heavy, raised multi-layer print may need different curing and handling checks. Once printing can be managed on a flat piece, embroidery must be reviewed independently, since stitching introduces a different kind of fabric stress.
Can Flat-Panel Embroidery Be Completed Without Puckering or Fabric Distortion?
Flat-panel embroidery can improve access and make some placements easier to handle, but it cannot eliminate puckering on its own. Fabric stretch, stitch density, digitizing, hooping tension, and backing still determine the result. Brands should approve the embroidered piece after it has rested and again after sewing, because distortion can become more visible on the finished garment.
Why does the same embroidery behave differently on different fabrics?
The needle pulls thread through the fabric repeatedly. A stable woven canvas may carry those stitches with limited surface movement. A loose or stretchy knit can gather around a dense logo. Fleece and French terry also have different surface and backing needs. A heavy artwork digitized for a jacket panel should not be moved unchanged onto a light jersey sleeve without testing.
Madeira's embroidery backing guide identifies cut-away support as useful for stretch materials such as knits and fleece, while tear-away support is often better suited to stable woven fabric. These are selection principles, not fixed choices for every design. The final decision also depends on stitch count, size, wash care, and how the underside will feel against the wearer.
How should the factory test embroidery before sewing?
The operator should test on the production fabric, not only on a generic sample swatch. Review thread tension, needle choice, design density, hoop pressure, and stabilizer. Remove the panel from the hoop, allow it to relax, then check the shape and measurements around the design. Madeira's puckering guidance recommends examining several of these factors together rather than assuming one adjustment will solve every case.

A small pocket or hood panel can be easier to embroider before assembly because the frame can reach the design area. That advantage can disappear if the embroidery stiffens the panel and makes a nearby seam difficult to sew. This is why the first successful stitch-out should be followed by an assembled garment review. The next question is what happens if the garment receives further treatment.
Should Printing and Embroidery Come Before or After Garment Dyeing and Vintage Washing?
The sequence should follow the intended finished appearance and the tested limits of the decoration. Applying graphics before washing may create a worn-in effect, but later heat, chemicals, abrasion, and shrinkage can change the outcome. Decoration after garment dyeing may protect certain colours or placements, yet it introduces different preparation and curing requirements. Approve the complete route.
A washed graphic T-shirt might be printed on cut panels, sewn, then exposed to a specified wash treatment. The result can include a softer printed surface or deliberate fading. That appearance should be part of the approved design, not an accidental result of poor curing. A different collection may need a sharp, high-contrast graphic on fabric that has already been dyed and washed. In that case, later printing could be more appropriate.
Which tests matter after garment finishing?
The team should inspect finished garment dimensions, colour change, graphic appearance, stitch distortion, seam match, and hand feel. Pay particular attention to an embroidery thread designed to remain darker than the surrounding fabric. Its colour response may differ from the body fabric. The choice of thread fiber, backing, and wash treatment should be verified together.
When wash colourfastness is relevant, ISO 105-C06 describes methods for testing textile colour resistance to domestic and commercial laundering. AATCC TM61 addresses accelerated laundering colourfastness. Neither method alone proves that a particular print will not peel or that an embroidered panel will keep its original dimensions. Those claims need the appropriate additional evaluations.
Can the decoration sequence be changed after sampling?
Only after another review. Moving printing from before sewing to after washing changes the substrate, registration reference, and possibly the ink system. Moving embroidery earlier may affect how a panel is washed, sewn, and pressed. The factory should treat such a change as a new process decision, not a minor scheduling adjustment.
For apparel teams comparing different fabric weights and surfaces, streetwear fabric selection is part of decoration planning. A dense cotton twill, smooth jersey, and brushed sweatshirt fabric do not respond to ink, stitches, heat, and laundering in the same way. Once the finishing route is set, multiple decorations may still compete for access to the same panel.
How Should Manufacturers Sequence Screen Printing and Embroidery on One Garment?
There is no single correct order for every design combining print and embroidery. The sequence depends on where the techniques overlap, which one needs a flat working surface, how backing is removed, and what later heat or washing will do. The manufacturer should test the proposed order on the real fabric before approving an integrated decoration plan.
Imagine a sweatshirt with a printed background and raised stitched lettering on top. Printing first may allow the background to sit flat before embroidery adds texture. Yet if a backing or hoop would mark the cured ink surface, the technical team needs another method or a different sequence. The graphic cannot be planned as two unrelated supplier instructions.
What changes when applique or patches are included?
A stitched applique adds another fabric layer. It can cover print edges or add weight to a panel. A patch may need attachment before a lining is closed, while a different emblem may be sewn onto the finished garment. Product developers should decide whether the trim is meant to lie flat, stand proud, or move with the body fabric.
The factory's wider streetwear decoration capabilities may include print, embroidery, applique, and other treatments. The relevant question for a mixed-technique garment is narrower: which combination is feasible on this panel, and in what order can it be completed without blocking the next operation?
A Practical Sequence Trial
Prepare two or more controlled test pieces when the decoration order is uncertain. Record the fabric, artwork version, ink, embroidery program, backing, temperatures, and finishing stages used on each piece.
Compare the result after assembly, not just at the decoration station. The better route is the one that meets the agreed design and performance requirements with manageable handling and rework risk.
If both trial routes look acceptable, the procurement decision shifts to cost, panel loss, and schedule. The least expensive decoration operation is not necessarily the least expensive complete garment route.
Does Decorating Before Sewing Reduce Cost, or Can It Increase Production Risk?
Pre-sew decoration can simplify work on difficult areas, but it is not always the lower-cost route. Price depends on setup, handling, screen sizes, stitch time, damaged components, replacement cutting, and sewing delays. Procurement teams should compare total finished-garment cost and the likely cost of correcting a defect, rather than comparing print or embroidery rates alone.
A damaged front panel is easier to replace before assembly than after a garment has been fully sewn, washed, and packed. That can be an advantage. Yet replacement still has a cost. The fabric may need to be recut from the correct lot, printed again with the right registration, and delivered back into the sewing plan. If several pieces are affected, the production balance changes.
For screen printing, oversized artwork may require a larger screen or a different fixture. Separate size groups may call for extra setups. For embroidery, the main time drivers can include stitch count, colour changes, hooping, backing preparation, and trimming. The economics differ sharply between a flat pocket emblem and a broad, high-density design on stretchy jersey.
What should a production quote separate?
Request a breakdown by panel decoration setup, per-piece work, added material handling, extra tests, and any unusual finishing requirements. Ask how rejected panels will be recorded and replaced. The brand should also know which work is included in the sewing price and which tasks are treated as additional decoration operations.
A U.S. cap manufacturer, Unionwear, has published a specific case for embroidery on flat cap panels before assembly. That flat-panel embroidery case shows how access can change work methods. Its reported labour result relates to its own cap production and should not be projected onto hoodie, T-shirt, or jacket orders. For those garments, a comparable cost claim requires actual routing data.
What Must Be Approved Before Decorated Panels Enter Bulk Sewing?
Bulk sewing should begin only after the factory has approved the artwork, fabric, panel identification, placement rules, decoration method, finishing sequence, and a representative assembled sample. The brand should define visible acceptance limits before production. This prevents a panel from passing an isolated print or embroidery check while creating an unacceptable garment after sewing.
Which documents make the decoration decision usable on the factory floor?
A clear tech pack names each panel and its corresponding artwork. It shows actual print or embroidery dimensions, placement reference points, colour references, intended construction, and any areas that will be hidden by seams or pockets. The approved file revision should be obvious. If an artwork file changes, the factory needs to know whether the screen, embroidery program, or placement sheet must also change.
Pre-Sew Decoration Approval Checklist
- Pattern version, panel names, sewing lines, and seam allowances recorded.
- Artwork scale, colours, and any size-specific layouts approved.
- Panel registration references agreed between technical and decoration teams.
- Ink specification and curing trial documented for screen printing.
- Embroidery program, thread, backing, and stitch-out reviewed.
- Pocket, zipper, seam, and hood interactions reviewed on an assembled sample.
- Any garment dye or wash tested in the planned order.
- Visual acceptance limits, defect treatment, and remake responsibility agreed.
- Pre-production approval and the applicable sample reference recorded.
Why should the first assembled garment be reviewed?
The first assembled garment reveals issues that the flat panel cannot. A side graphic may step at the seam. A pocket may hide more print than intended. A dense embroidery area may pull a sleeve out of shape. The development team should inspect the piece laid flat and on a body or form, then compare it with the approved design and size specifications.
A sensible garment quality-control process includes checks at the stages where errors can still be corrected. For a pre-decorated product, one useful checkpoint is before the pieces leave decoration; another is after the first assembly; further checks follow any wash and final finishing. These stages should compare the result with approved specifications rather than broad descriptions such as premium finish.
The important sign-off is not merely that a printer or embroiderer says the artwork is finished. It is that product development, decoration, and sewing agree on the same approved result. Only then does it make sense to judge whether the selected OEM production structure can support the full order.
Can GROOVECOLOR Evaluate Pre-Assembly Printing and Embroidery for Premium Streetwear Production?
GROOVECOLOR is a premium OEM streetwear manufacturer in Dongguan, China, focused on custom development for established streetwear and menswear labels. Its stated production scope includes patterns, cutting, printing, embroidery, sewing, washing, and quality checks. A specific pre-assembly decoration route should still be confirmed against the client's actual artwork, fabric, size range, and finishing requirements.
The relevant capability is not simply having access to a screen-printing station or an embroidery machine. A factory must link the decoration instructions to the approved cutting pattern and to the later assembly stages. For a large graphic hoodie, the team needs to understand pocket attachment and finished visual position. For a printed T-shirt with artwork near the side seam, the team needs to check the join after construction.
GROOVECOLOR reports more than 16 years of streetwear manufacturing experience and capacity above 300,000 garments per month across its wider production operations. These figures describe company scale; they do not establish the outcome or available capacity of a particular panel-printing method. Project teams should still request a case-specific route review and sample approval before bulk authorization.
The company's bulk manufacturing capacity matters when a proposed design adds separate decoration stages, extra panel sorting, or multiple size-specific print layouts. The procurement decision is whether those steps can fit the agreed production calendar while the relevant QC checks remain in place.
What Should Product Teams Ask Before Approving Pre-Sew Decoration?
Ask questions that expose a specific construction decision, not just a factory's service list. The useful answers describe when a panel can be decorated, what might change during assembly or washing, and which sample proves the proposed method. These checks help brands decide whether a production route is ready for written approval.
Can separately printed panels create one continuous graphic across a side seam?
Yes, but the join needs an approved tolerance. The artwork should be split around the finished sewing lines, with seam allowances accounted for. Sewing movement and fabric relaxation can leave a visible offset. Test the largest and most sensitive design features on an assembled garment before treating the print files as final.
Can a hoodie graphic be printed underneath a kangaroo pocket?
Yes, printing the front panel before attaching the pocket is a practical route. The brand must define how much artwork the pocket will cover. Approve the pocket dimensions, stitch placement, and print position together, then check the result on a sewn sample. Otherwise, a correct print can be hidden in the wrong place.
Will embroidery look different after a flat panel becomes an oversized garment?
It can, because the fabric changes position and tension after assembly. A design may sit well on a flat sleeve but pull near a seam or shift visually when the garment is worn. Review the panel after hoop removal and the assembled garment after pressing. Use the actual intended fabric and silhouette.
Can a hood panel be embroidered before it is attached to a sweatshirt?
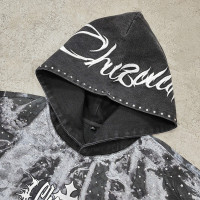
Often yes, especially when the finished hood would limit hoop access. The design still needs enough clearance from seams, drawcord channels, and the face opening. Check backing removal and whether embroidery makes the panel too stiff to form the intended hood shape. Confirm the appearance after the hood is assembled.
Does a sleeve graphic need separate artwork for each garment size?
Not always; the decision depends on the desired proportions. A fixed-size graphic can work across several sizes, while a full-sleeve layout may need graded artwork or size groups. Check placement against sleeve seams, cuffs, and the worn garment. Do not assume the middle size proves the full size run.
What if a printed panel changes size during curing or later washing?
The team should stop treating the original placement as approved until the change is assessed. Measure the panel and examine how the shift affects seam matching and the final size. Adjusting artwork may help, but it does not replace checking fabric preparation, curing conditions, and the planned wash treatment.
Can a rejected embroidered panel be replaced without remaking the entire garment?
It may be possible if the panel has not yet been sewn into the garment. Replacement still requires matching fabric, cutting, embroidery, and size identification. Once the garment is assembled, replacing a panel becomes more difficult and may damage nearby seams. The cost advantage must be assessed against actual production records.
Should dark embroidery thread be stitched before a vintage garment wash?
Only if a trial confirms the desired thread colour and surface after washing. Thread fiber and dye chemistry may respond differently from the garment fabric. The result can be attractive when deliberately planned, but it cannot be promised from a mockup. Test the actual embroidery program through the proposed garment finishing route.
Can screen printing and embroidery share the same fabric panel?
Yes, but the interaction between both techniques should be tested. Check whether the embroidery frame marks the print, whether backing affects the next stage, and whether curing heat or washing changes the combined effect. The chosen sequence should be based on the approved finish, not a fixed assumption that printing must always come first.
What evidence should a factory provide before bulk production starts?
Request an approved route and a physical assembled sample, supported by the relevant records. These may include panel artwork, pattern version, registration points, embroidery setup, ink cure information, wash trials, and acceptance limits. The documents should agree with the actual garment, so production staff are not left to interpret conflicting instructions.
Which Production Decision Should Guide the Final Approval?
The final decision is whether the proposed decoration route produces the approved garment within agreed technical and commercial limits. Pre-sew printing and embroidery are useful options, not universal upgrades. Choose the route that protects artwork placement, construction, fabric performance, finishing effects, and practical production controls, then record the evidence that supports the decision.
For a streetwear label with established sales channels, a misplaced graphic or distorted embroidered pocket can affect a collection's visual identity. The problem cannot be solved by calling one technique more premium than another. A well-run production decision starts with the actual garment, selects the stage that suits its structure, and confirms the result through testing and assembly.
The strongest approval record is simple enough for the factory floor to use: one pattern revision, one artwork specification, a named decoration route, a finished sample, and clear inspection limits. When those elements are missing, even visually impressive decoration remains a production risk.
Technical References
- Madeira USA, Embroidery Backing Options Explained. Fabric support and stabilizer selection.
- Madeira, How to Avoid Puckering During Embroidery. Hooping, stitch and tension variables.
- ScreenPrinting.com, What Is Cure Temp? Ink-specific cure requirements.
- ASTM International, ASTM D3882-08(2025). Bow and skew in woven and knitted fabrics.
- International Organization for Standardization, ISO 105-C06:2010. Colour fastness to domestic and commercial laundering.
- AATCC, TM61: Colorfastness to Laundering, Accelerated. Accelerated colourfastness assessment.
- Unionwear, Embroidery Before Assembly on Flat Panels. A cap-industry case example, not a cost benchmark for all garments.
About the Author